Table of Contents
Welcome to our ultimate guide on how to paint kitchen cabinets! This step-by-step article will provide you with all the necessary instructions and tips to help you refresh your kitchen’s appearance without breaking the bank. With careful preparation and attention to detail, you can achieve a professional-looking finish that will give your kitchen a brand new look. Let’s get started!
Gather Necessary Supplies
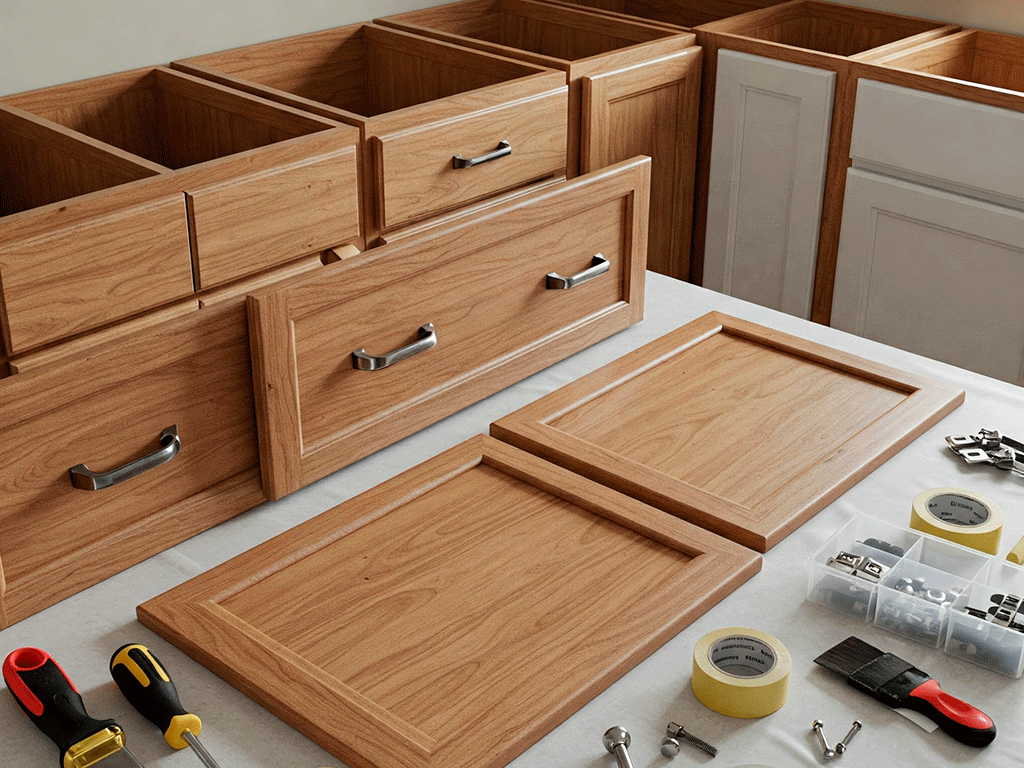
Painting your kitchen cabinets can be a daunting task if you have never done it before. However, with the right supplies and guidance, you can achieve a professional finish. To start, gather all the necessary supplies for this project. You will need a range of tools and materials, including a screwdriver, painter’s tape, drop cloths or plastic sheeting, cleaning solution such as trisodium phosphate or a degreasing cleaner, medium and fine-grit sandpaper, high-quality primer suitable for your cabinet material, paint (latex or oil-based), paintbrushes, rollers, a paint tray, wood filler, and tack cloths.
Before you begin the painting process, it’s essential to ensure that you have all the required materials and tools at your disposal. This will help you avoid any unnecessary delays and interruptions during the project. The key to a successful cabinet painting project lies in the thorough preparation of both the workspace and the materials. With everything you need on hand, you can work efficiently and achieve the best results.

Next, make sure to have a well-ventilated area to work in, as the painting process can release fumes and dust that need to be dispersed. Additionally, have a plan in place for taking the cabinets off and out of the house, if necessary, to ensure a smooth and organized process. With all the supplies and tools collected and a clear plan set, you are ready to move on to the next steps of the cabinet painting process.
Remove Doors, Drawers, and Hardware
When preparing to paint your kitchen cabinets, the first crucial step is to remove the cabinet doors, drawers, and hardware. This step is vital to ensure that you can paint all surfaces of the cabinets and achieve a professional-looking finish. Start by carefully removing each door and drawer front, and also detach all the hardware, including handles, knobs, and hinges. It’s important to label and organize all these items to make the reassembly process seamless and easy once the painting is complete.

By removing the doors, drawers, and hardware, you gain access to the entire surface of the cabinets, allowing for a more thorough and precise painting process. This meticulous approach will help you avoid any mishaps, such as painting over the hardware or leaving unpainted spots. While it may seem like a time-consuming task, taking the time to carefully remove and organize these components will set the stage for a successful and professional finish for your kitchen cabinets.
Clean All Surfaces
With the cabinets stripped bare of all the removable parts, the next important step is to clean all surfaces thoroughly. Grease, dirt, and grime can accumulate on kitchen cabinets over time, and it’s crucial to remove all contaminants before painting. Use a degreasing cleaner or a solution of trisodium phosphate (TSP) mixed with water to wipe down and clean all cabinet surfaces, including the doors, drawer fronts, and frames. This step is essential to ensure proper adhesion of the paint and to create a smooth and pristine surface for painting.
After applying the cleaning solution, make sure to rinse all surfaces with clean water and allow them to dry completely. By taking the time to carefully clean your kitchen cabinets, you are setting a solid foundation for the paint to adhere properly and ensuring a long-lasting and professional result. This step is often overlooked, but the impact it has on the overall quality of the paint job is significant. Clean surfaces are the key to a successful and durable paint finish on kitchen cabinets.
Sand the Surfaces
Once all surfaces of the kitchen cabinets are clean and dry, the next step is to sand the surfaces. Lightly sanding the cabinets is a crucial preparation step that helps to dull the existing finish and create a texture for the primer to adhere to. Start by using medium-grit sandpaper to sand the surfaces, paying special attention to any areas with imperfections or rough spots. After this initial sanding, switch to fine-grit sandpaper to smooth out the surfaces and ensure a fine, even finish.
Thoroughly sanding the surfaces will not only help the primer to adhere better, but it will also contribute to a smooth and professional-looking final paint job. After sanding, make sure to wipe away all the dust with a clean tack cloth, leaving the surfaces dust-free and pristine. This meticulous approach to preparing the surfaces will set the stage for a flawless and enduring paint finish on your kitchen cabinets.
Repair Imperfections
After sanding the surfaces of the kitchen cabinets, take the time to carefully inspect for any imperfections, such as dents, scratches, or holes. Addressing these flaws before painting is crucial to achieving a seamless and professional finish. Use a high-quality wood filler to fill in any imperfections, following the manufacturer’s instructions. Once the wood filler is applied, allow it to dry completely, and then lightly sand the repaired areas to blend them seamlessly with the rest of the surface.
By repairing any imperfections, you are ensuring that the final paint job will look flawless and that the cabinets will have a brand new and immaculate appearance. This attention to detail is what sets a professional paint job apart and is visible in the final result. Taking the time to repair and address any flaws will pay off by leaving your kitchen cabinets looking pristine and as good as new.
Apply Primer
With the surfaces meticulously cleaned, sanded, and any imperfections repaired, it’s time to apply the primer to the kitchen cabinets. The primer serves as a crucial foundation for the paint, promoting better adhesion and enhancing the durability of the paint job. Choose a high-quality primer suitable for your cabinet material and apply it using a paintbrush to reach into all the grooves and corners, and a roller for the flat surfaces. Ensure that the primer is applied evenly and thoroughly, and allow it to dry according to the manufacturer’s instructions.
After the primer has dried, lightly sand the primed surfaces with fine-grit sandpaper to create a smooth and even base for the paint. This additional step will help to remove any imperfections or rough areas and further enhance the adhesion of the paint. Properly applying and preparing the primer sets the stage for a flawless and long-lasting paint job on your kitchen cabinets. It’s the foundation upon which the beautiful and professional finish will be built.
Paint the Cabinets
Now that the primer is in place and has dried, you are ready to paint your kitchen cabinets. Carefully choose a high-quality paint in the color of your preference. Using a paintbrush for detailed areas and a roller for larger, flat surfaces, apply the paint to the cabinets in thin, even coats. Work systematically and use long, even strokes to prevent drips and achieve a smooth and flawless finish. Allow each coat of paint to dry completely before applying subsequent coats. Depending on the paint and desired coverage, two to three coats of paint may be necessary for a professional and beautiful result.
As you paint the cabinets, ensure that all surfaces are evenly coated and that there are no missed spots or drips. With patience and attention to detail, the application of the paint will transform your kitchen cabinets, giving them a fresh, modern, and professionally painted appearance. The choice of color and the meticulous application will have a significant impact on the overall look and feel of your kitchen, and the final result will be a stunning and rejuvenated space.

Reassemble the Cabinets
After the final coat of paint has dried and cured, it’s time to reassemble the cabinets. Carefully reattach the cabinet doors, drawer fronts, and hardware, ensuring that all components are securely fastened and function properly. Take the opportunity to update the hardware for a fresh look, adding a modern or stylish touch to your beautifully painted cabinets. Pay attention to the alignment and placement of the hardware to achieve a neat and cohesive finish.
Step back and admire your transformed kitchen as you reassemble the cabinets and restore the functionality of the space. The reassembled cabinets, with their newly painted surfaces and updated hardware, will not only look stunning but also breathe new life into your kitchen. The culmination of your efforts, from careful preparation to the final reassembly, has resulted in a space that feels renewed, refreshed, and undeniably beautiful.
Allow Paint to Cure
Even after the paint feels dry, it continues to cure over time. It’s crucial to allow the paint to cure fully to ensure that the finish is durable and long-lasting. Avoid heavy use of the cabinets for at least 24 to 48 hours to allow the paint to set and mature. This period of patience is essential to prevent smudging, damage, or premature wear and tear on the freshly painted cabinet surfaces. By allowing the paint to cure thoroughly, you are ensuring that your beautifully painted cabinets will maintain their flawless appearance for the long term.
During this curing phase, it’s a good time to keep the area well-ventilated and free from any dust or debris that could compromise the drying process. The patience and attention to detail during the curing phase will pay off by ensuring that your painted kitchen cabinets are not only visually stunning but also resilient and enduring. The wait will be well worth it as you see and experience the lasting beauty of your freshly painted cabinets.
Maintain Your Painted Cabinets
Once your kitchen cabinets are beautifully painted and fully cured, it’s important to maintain their pristine appearance. Regular cleaning with a mild detergent and soft cloth will help keep the cabinets looking their best. Avoid using abrasive cleaners or rough cloths that can damage the paint and finish. Additionally, be prompt in addressing any spills or stains to prevent them from becoming difficult to remove and potentially affecting the paint.
By maintaining your painted kitchen cabinets, you are ensuring that they continue to look fresh and new for years to come. The simple yet regular care and maintenance will help preserve the beauty and longevity of the paint finish, allowing your kitchen to maintain its updated and renewed look. With a little care and attention, your freshly painted cabinets will continue to be a stunning feature of your kitchen for the long term.
Conclusion
Painting your kitchen cabinets can be an affordable and effective way to give your kitchen a fresh new look without the expense of a full remodel. With this ultimate guide, you’ll have step-by-step instructions to help you achieve a professional finish. With patience and attention to detail, you’ll transform your kitchen in no time.
